Window Options
Through window options, you can set the background type of the window, light or dark theme, visibility of the title bar, visibility of the title bar menu buttons, etc.
Here is an introduction to window options.
WindowOption
Tool class for setting window options.
| AttachedProperty | Type | Description |
|---|---|---|
| Backdrop | WindowBackdrop | The type of window backdrop, can be Auto, None, Mica, Acrylic or MicaAlt. Default is “Auto” |
| Corner | WindowCorner | The type of window corner, can be default(Default), DoNotRound, Round, RoundSmall. Default is “Default” |
| CaptionColor | WindowOptionColor | The color of the window caption bar, can be default(Default), None or any custom RGB color. Default is “Default” |
| TextColor | WindowOptionColor | The color of the text on the caption bar, can be default(Default), None or any custom RGB color. Default is “Default” |
| BorderColor | WindowOptionColor | The color of the window border, can be default(Default), None or any custom RGB color. Default is “Default” |
| IsDarkMode | bool | Indicates if the window is in dark mode. Default is false |
| AccentState | WindowAccentState | The style state of the window, can be None(None), Gradient(Gradient), Transparent(Transparent), BlurBehind(BlurBehind), AcrylicBlurBehind(AcrylicBlurBehind) or HostBackdrop. Default is “None” |
| AccentBorder | bool | Indicates if the application window style has border when using accent. Default is true |
| AccentGradientColor | Color | The gradient color for the window style. Default is ScRGB(0.25, 1, 1, 1) |
| IsCaptionMenuVisible | bool | Whether the caption menu of the title bar is visible, which includes the application icon, and the minimize, maximize, and close buttons. Default is true. |
| IsMinimumButton | bool | Represents whether a Visual is the minimize button of a window, used for customizing the minimize button. Default is false. |
| IsMaximumButton | bool | Represents whether a Visual is the maximize button of a window, used for customizing the maximize button. Default is false. |
| IsCloseButton | bool | Represents whether a Visual is the close button of a window, used for customizing the close button. Default is false. |
Set window background on Windows 11
If the system version is greater than or equal to 22621, the window background can be set using WindowOption.Backdrop. Make sure to set the window background as Transparent; otherwise, the default white window background will overshadow your set background.
Example
<Window x:Class="TestWpf.MainWindow"
        xmlns="http://schemas.microsoft.com/winfx/2006/xaml/presentation"
        xmlns:x="http://schemas.microsoft.com/winfx/2006/xaml"
        xmlns:ws="https://schemas.elecho.dev/wpfsuite"
        xmlns:local="clr-namespace:TestWpf"
        ws:WindowOption.Backdrop="Mica"
        Background="Transparent"
        Title="MainWindow" Height="300" Width="450">

</Window>
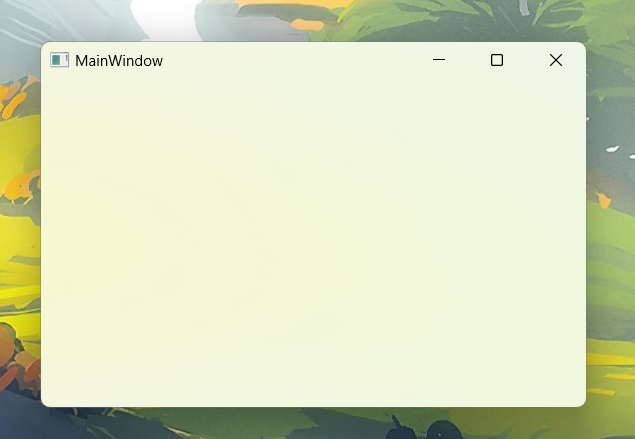
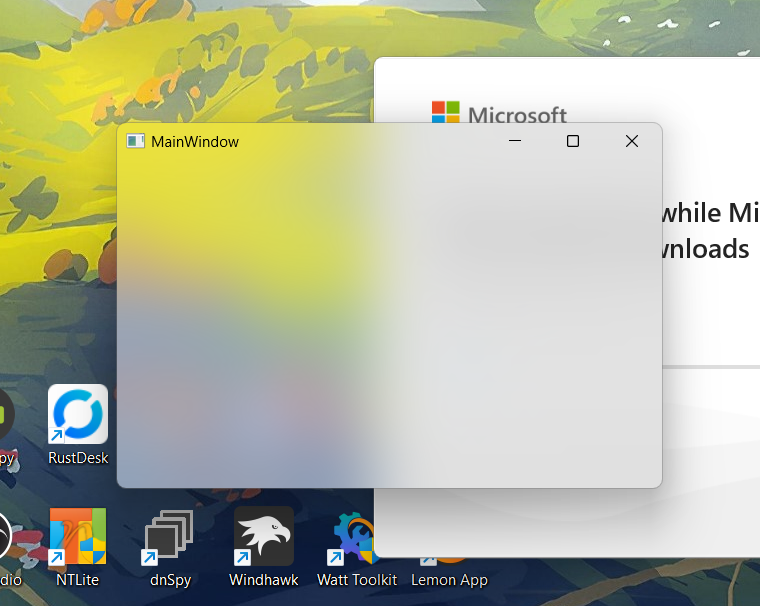
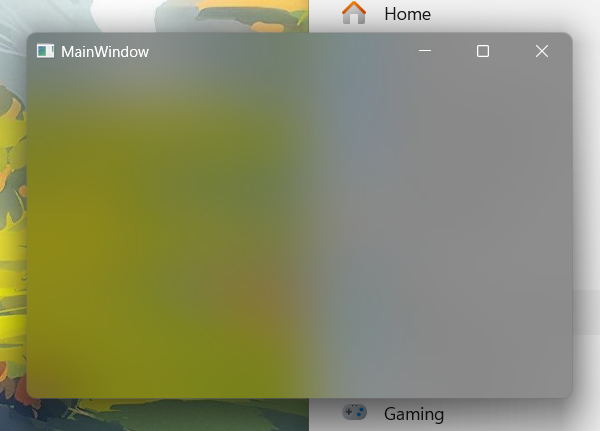
Change the value of ws:WindowOption.Backdrop to Acrylic, and the effect will be like this:
Note: If you need to use WindowChrome, GlassFrameThickness represents the thickness at which the background effect is applied.
Because GlassFrameThickness is set to 0 by default, you will notice that the background effect is no longer present. Setting it to -1 (infinite) will allow you to see the background again.
<Window x:Class="TestWpf.MainWindow"
        xmlns="http://schemas.microsoft.com/winfx/2006/xaml/presentation"
        xmlns:x="http://schemas.microsoft.com/winfx/2006/xaml"
        xmlns:ws="https://schemas.elecho.dev/wpfsuite"
        xmlns:local="clr-namespace:TestWpf"
        ws:WindowOption.Backdrop="Mica"
        Background="Transparent"
        Title="MainWindow" Height="300" Width="450">
    <WindowChrome.WindowChrome>
        <WindowChrome GlassFrameThickness="-1"/>
    </WindowChrome.WindowChrome>
</Window>
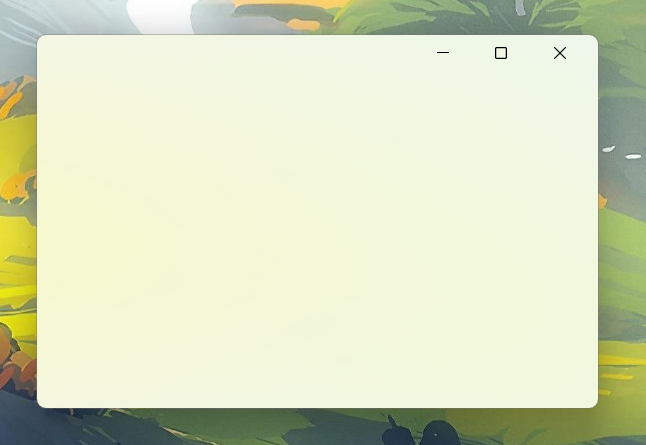
In fact, Backdrop also requires the CompositionTarget.BackgroundColor value of the window HwndSource to be Transparent. So if you set it to another value, Backdrop will also be invalid.
Enabling Dark Mode for Windows 11 Window
In system version 22000, you can enable dark mode for windows, which will make the title bar and settings window background become dark.
Example
<Window x:Class="TestWpf.MainWindow"
        xmlns="http://schemas.microsoft.com/winfx/2006/xaml/presentation"
        xmlns:x="http://schemas.microsoft.com/winfx/2006/xaml"
        xmlns:ws="https://schemas.elecho.dev/wpfsuite"
        xmlns:local="clr-namespace:TestWpf"
        ws:WindowOption.Backdrop="Mica"
        ws:WindowOption.IsDarkMode="True"
        Background="Transparent"
        Title="MainWindow" Height="300" Width="450">

</Window>
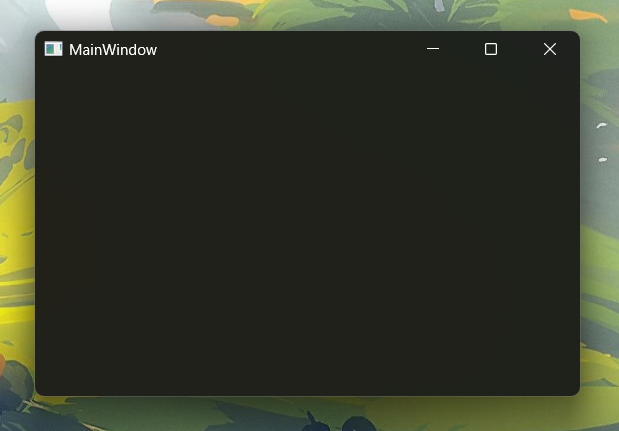
The same applies under an acrylic background window.
Setting Color and Borders on Windows 11
Setting the title bar color, text color, window edge style, and border color can be done when the system version is higher than 22000.
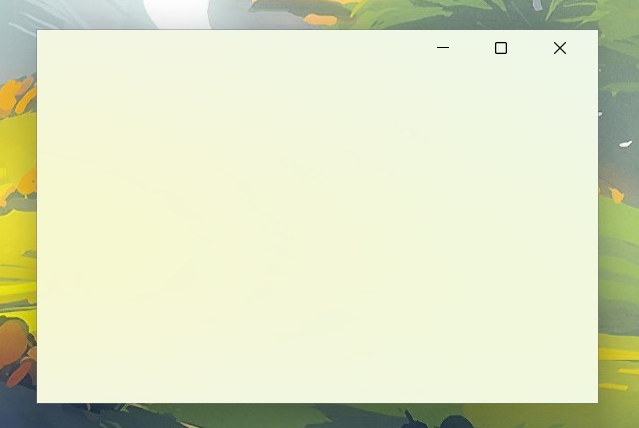
Disable corner rounding
<Window x:Class="TestWpf.MainWindow"
        xmlns="http://schemas.microsoft.com/winfx/2006/xaml/presentation"
        xmlns:x="http://schemas.microsoft.com/winfx/2006/xaml"
        xmlns:ws="https://schemas.elecho.dev/wpfsuite"
        xmlns:local="clr-namespace:TestWpf"
        ws:WindowOption.Backdrop="Mica"
        ws:WindowOption.Corner="DoNotRound"
        Background="Transparent"
        Title="MainWindow" Height="300" Width="450">
    <WindowChrome.WindowChrome>
        <WindowChrome GlassFrameThickness="-1"/>
    </WindowChrome.WindowChrome>
</Window>
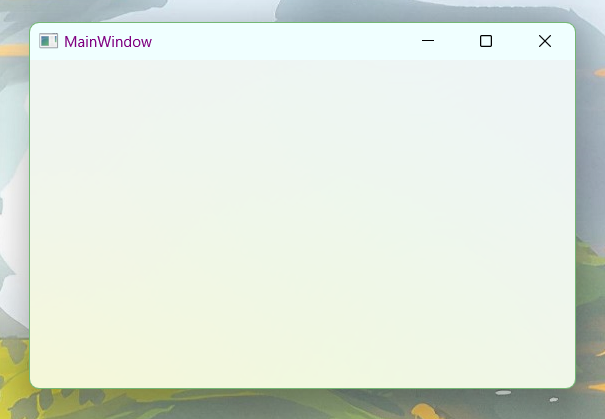
Set the color of the title bar, text, and border.
<Window x:Class="TestWpf.MainWindow"
        xmlns="http://schemas.microsoft.com/winfx/2006/xaml/presentation"
        xmlns:x="http://schemas.microsoft.com/winfx/2006/xaml"
        xmlns:ws="https://schemas.elecho.dev/wpfsuite"
        xmlns:local="clr-namespace:TestWpf"
        ws:WindowOption.Backdrop="Mica"
        ws:WindowOption.CaptionColor="Azure"
        ws:WindowOption.TextColor="Purple"
        ws:WindowOption.BorderColor="#74b874"
        Background="Transparent"
        Title="MainWindow" Height="300" Width="450">

</Window>
Use Acrylic in Windows 10
As early as Windows 10, it has been possible to set the background using a hidden API called “SetWindowCompositionAttribute.” The only drawback is that it cannot extend the acrylic effect to the title bar area.
Using AccentState to set the window background to acrylic.
<Window x:Class="TestWpf.MainWindow"
        xmlns="http://schemas.microsoft.com/winfx/2006/xaml/presentation"
        xmlns:x="http://schemas.microsoft.com/winfx/2006/xaml"
        xmlns:ws="https://schemas.elecho.dev/wpfsuite"
        xmlns:local="clr-namespace:TestWpf"
        ws:WindowOption.AccentState="AcrylicBlurBehind"
        ws:WindowOption.AccentGradientColor="Transparent"
        Background="Transparent"
        Title="MainWindow" Height="300" Width="450">

</Window>
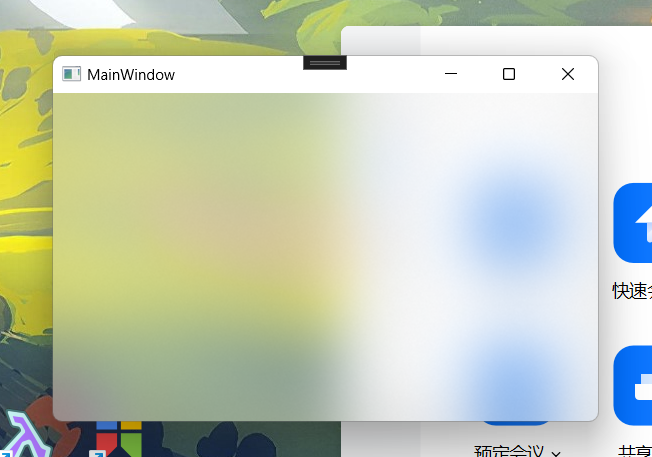
Note that if you want to use WindowChrome, unlike Backdrop, the AccentState requires GlassFrameThickness to be set to 0. Otherwise, the acrylic effect will not be displayed.
Of course, by removing the title bar in any way, you can obtain a clean acrylic window. For example, you can set WindowStyle to None and ResizeMode to NoResize.
Remove the title bar for the acrylic.
<Window x:Class="TestWpf.MainWindow"
        xmlns="http://schemas.microsoft.com/winfx/2006/xaml/presentation"
        xmlns:x="http://schemas.microsoft.com/winfx/2006/xaml"
        xmlns:ws="https://schemas.elecho.dev/wpfsuite"
        xmlns:local="clr-namespace:TestWpf"
        ws:WindowOption.AccentState="AcrylicBlurBehind"
        WindowStyle="None"
        ResizeMode="NoResize"
        Background="Transparent"
        Title="MainWindow" Height="300" Width="450">

</Window>
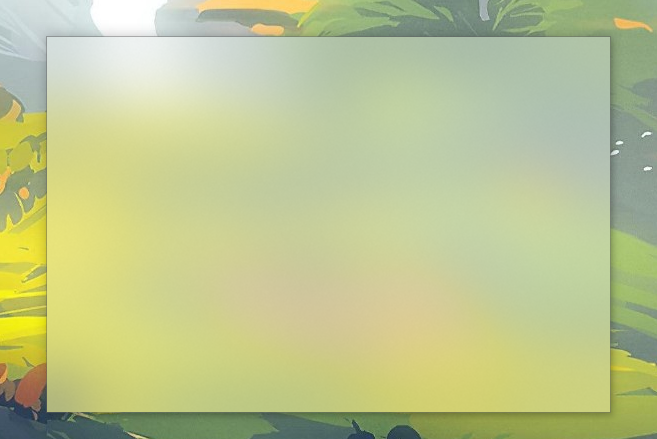
The reason why the window has a border even though the
WindowStyleis set toNoneis because theAccentBorderis set to true by default. When applying the Accent using API at the underlying level, a border is still added to the window.
Of course, using WindowChrome can also get a clean acrylic window without the title bar, while retaining the functionality of dragging and resizing the window borders. However, the minimize, maximize, and close buttons of the window will disappear.
<Window x:Class="TestWpf.MainWindow"
        xmlns="http://schemas.microsoft.com/winfx/2006/xaml/presentation"
        xmlns:x="http://schemas.microsoft.com/winfx/2006/xaml"
        xmlns:ws="https://schemas.elecho.dev/wpfsuite"
        xmlns:local="clr-namespace:TestWpf"
        ws:WindowOption.AccentState="AcrylicBlurBehind"
        Background="Transparent"
        Title="MainWindow" Height="300" Width="450">
    <WindowChrome.WindowChrome>
        <WindowChrome GlassFrameThickness="0"/>
    </WindowChrome.WindowChrome>
</Window>
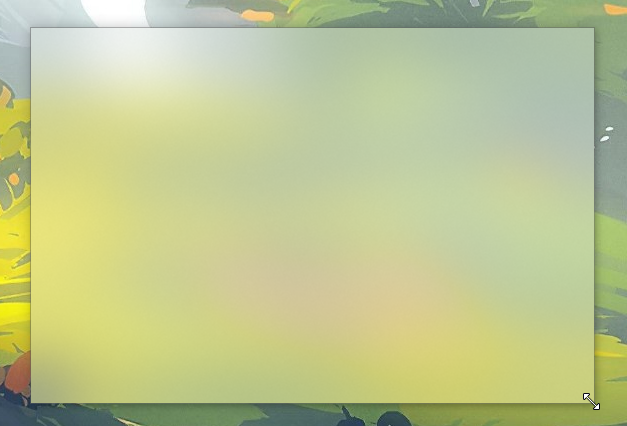
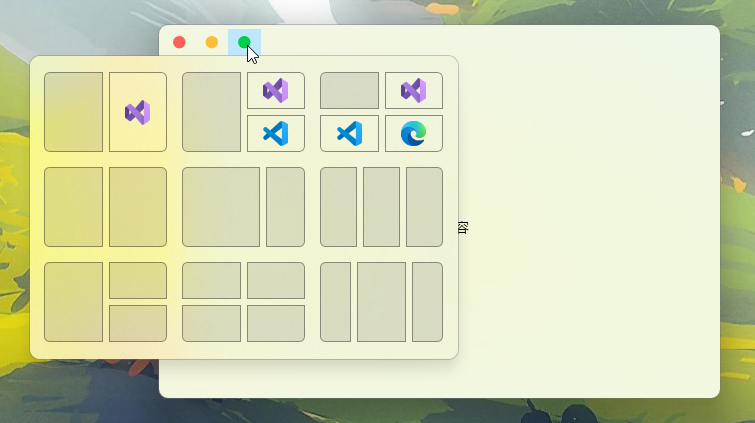
Custom window caption menu buttons
If you want to remove the three buttons of the window and replace them with custom implementations, you can perform the following steps:
- Set ws:WindowOption.IsCaptionMenuVisible of the Window to false to remove the system’s caption menu.
- Set ws:WindowOption.IsMaximumButton of the custom maximize button to true to correctly respond to system behavior.
Example
<Window x:Class="TestWpf.MainWindow"
        xmlns="http://schemas.microsoft.com/winfx/2006/xaml/presentation"
        xmlns:x="http://schemas.microsoft.com/winfx/2006/xaml"
        xmlns:ws="https://schemas.elecho.dev/wpfsuite"
        xmlns:local="clr-namespace:TestWpf"
        ws:WindowOption.Backdrop="Mica"
        ws:WindowOption.IsCaptionMenuVisible="False"
        Background="Transparent"
        Title="MainWindow" Height="300" Width="450">
    <WindowChrome.WindowChrome>
        <WindowChrome GlassFrameThickness="-1"/>
    </WindowChrome.WindowChrome>
    <DockPanel>
        <Grid Height="25"
              DockPanel.Dock="Top">
            <StackPanel HorizontalAlignment="Left"
                        Orientation="Horizontal"
                        Margin="4 4 0 0">
                <Button Padding="8 0"
                        Background="Transparent"
                        BorderThickness="0"
                        ws:WindowOption.IsCloseButton="True">
                    <Ellipse Width="10" Height="10" Fill="#f9605a"/>
                </Button>
                <Button Padding="8 0"
                        Background="Transparent"
                        BorderThickness="0"
                        ws:WindowOption.IsMinimumButton="True">
                    <Ellipse Width="10" Height="10" Fill="#febc3a"/>
                </Button>
                <Button Padding="8 0"
                        Background="Transparent"
                        BorderThickness="0"
                        ws:WindowOption.IsMaximumButton="True">
                    <Ellipse Width="10" Height="10" Fill="#00cd4d"/>
                </Button>
            </StackPanel>
        </Grid>

        <Grid>
            <TextBlock Text="Window Content"
                       VerticalAlignment="Center"
                       HorizontalAlignment="Center"/>
        </Grid>
    </DockPanel>
</Window>
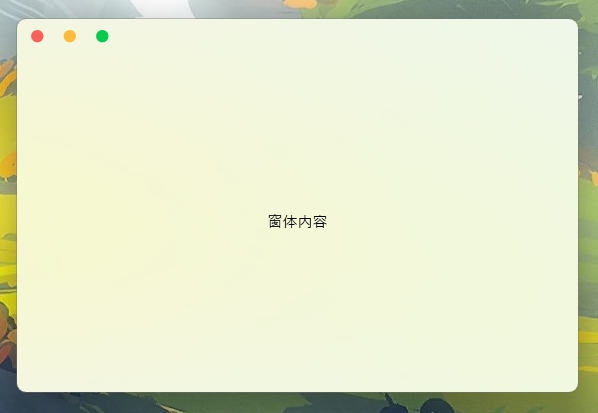
If you are using the Windows 11 operating system, when you hover your mouse over the maximize button, layout options will also be displayed correctly.
